In this article, you will learn how to setup leech protection in cPanel. Leach protection protects against unauthorized visitors logging in to secure parts of your website.
An example of this would be asking for support with a plugin you’re using on WordPress and the developer needs access to your account to diagnose the issue.
If the username and password are then seen by colleagues leech protection will protect you from any more logging use the username and password.
How to Enable leech protection in cPanel
To enable leech protection in cPanel, follow these steps:
- Log in to cPanel.
If you’re unsure of how to log in to cPanel please follow this article. - In the search bar type, Leech Protection then click it.
- Find the name of the directory you wish to protect.
- Click Edit.
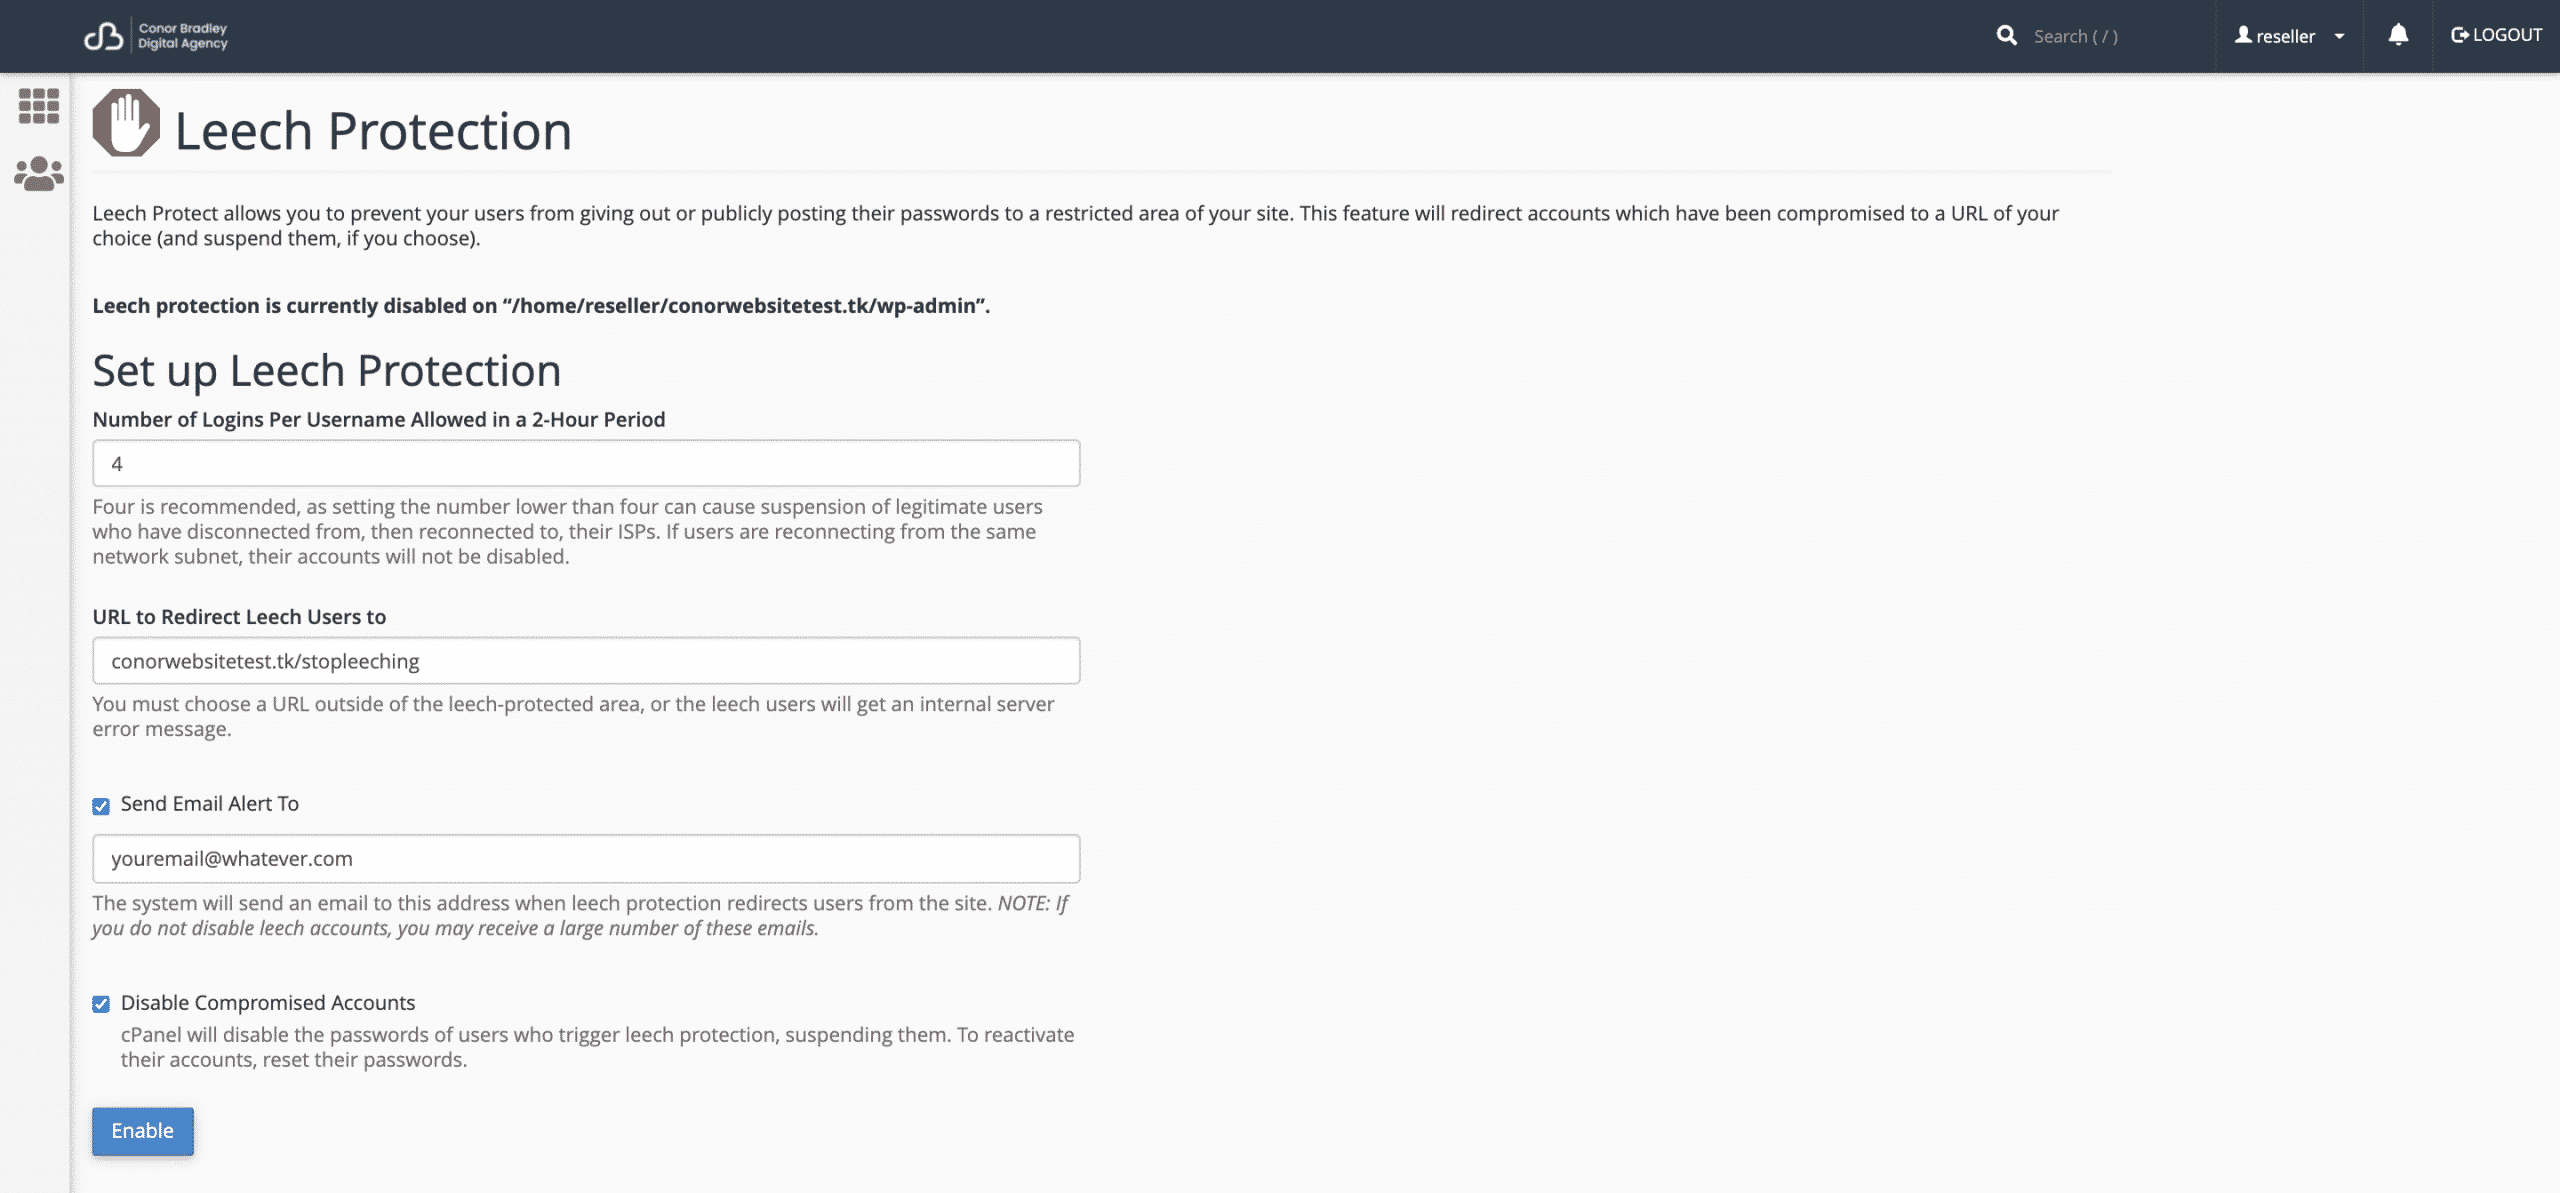
- Type the number of logins per username allowed in a 2-Hour Period
- Type a URL to redirect leeched users to.
This must be a URL outside of the leech-protected area - If you would like to receive an e-mail alert when the leech protection redirects users from the site, Press the checkbox then type an email address.
- If you wish to disable compromised accounts, Press the checkbox
- Click .

How to disable leech protection in cPanel
To enable leech protection in cPanel, follow these steps:
- Log in to cPanel.
If you’re unsure of how to log in to cPanel please follow this article. - In the search bar type, Leech Protection then click it.
- Find the name of the directory you wish to protect.
- Click Edit.
- Under Disable Protection, click .


Facebook | Twitter | Instagram | LinkedIn | Youtube | Vimeo | Blog | Knowledge Base | Client Area | Google Business


